How to Waterproof a Basement from the Interior
Ask the average homeowner how basement waterproofing is done and the first words out of his or her mouth are likely to be “I guess they have to dig up my foundation.”
This isn’t necessarily wrong. In many cases, the best way to permanently waterproof a basement will begin with excavation to install an exterior waterproofing membrane and/or exterior drain tile. These are very effective methods that are recommended under certain conditions such as when water seeps over the top of a foundation wall or when serious degradation has occurred in the mortar joints of a masonry foundation wall.
What may surprise a lot of homeowners is that many basement waterproofing techniques, including the one used most frequently, are implemented from inside the basement.
Even when the basement is finished certain interior waterproofing techniques are still the recommended approach because the minor impact on the finished space is outweighed by the benefits of the waterproofing system.
So, how is basement waterproofing done from the inside?
Waterproofing a Basement from the Interior
There are two main methods of waterproofing a basement from the interior, crack injection and interior drain tile.
The most common type of foundation in American homes is one constructed of poured concrete and the most frequently found source of seepage in such a foundation is a non-structural crack in the basement wall. A non-structural crack is one that does not indicate a problem that threatens the stability of the foundation and is generally narrower than 1÷8”.
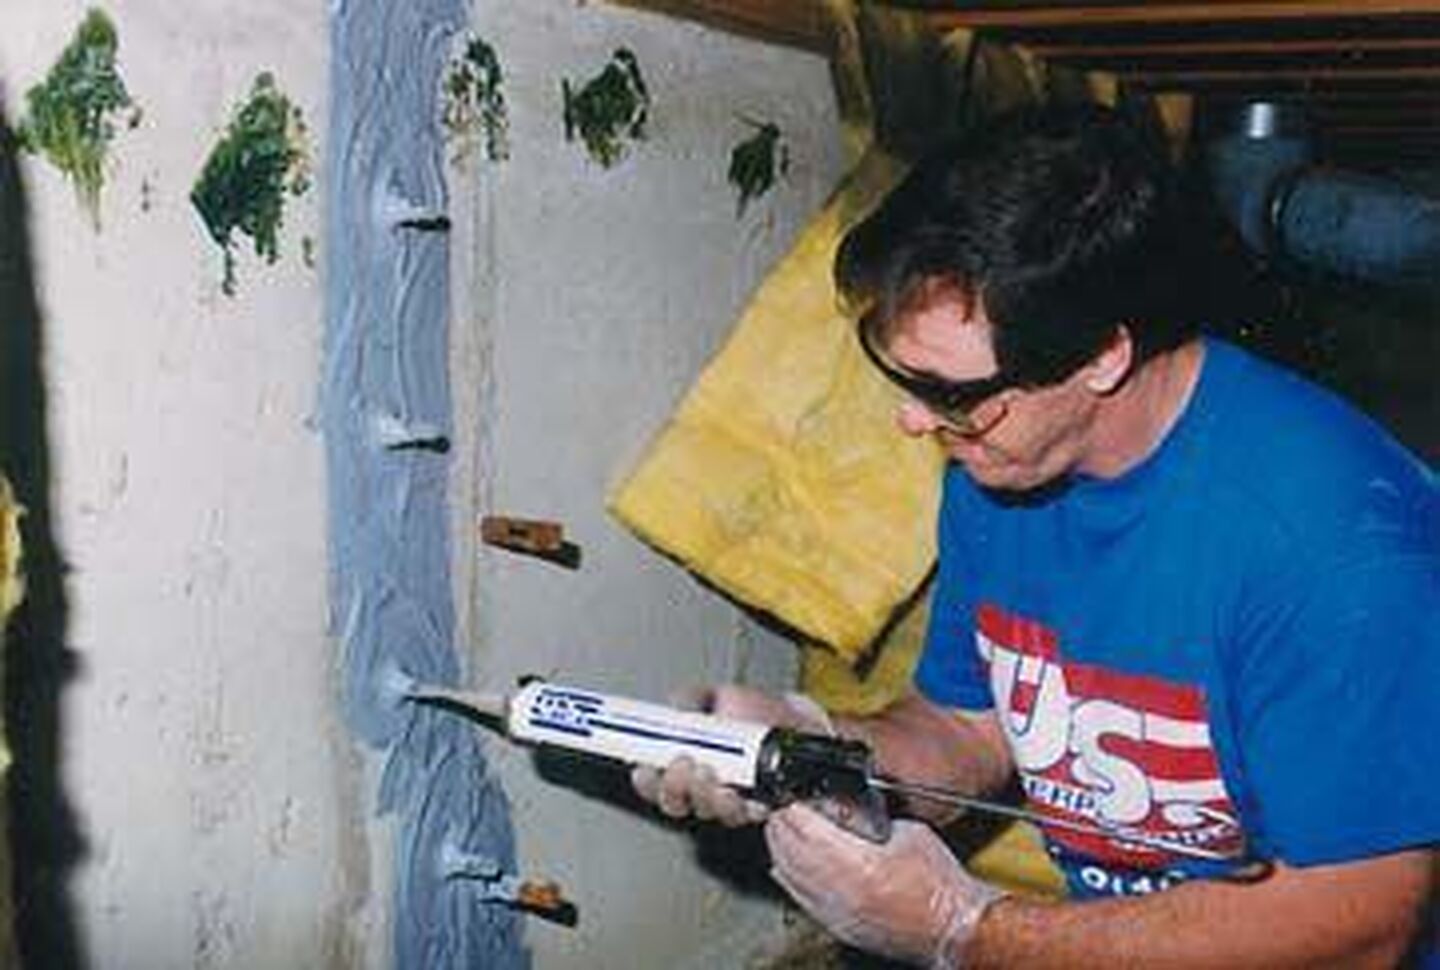
The best way to repair a seeping wall crack is to inject it with expanding polyurethane. An installer begins by cleaning the crack of loose concrete and debris and placing plastic injection ports at intervals along the length of the crack. An epoxy sealer coat is then applied to cover the crack and secure the ports.
After the epoxy has cured, the installer injects each port, beginning at the top, with the polyurethane material that fills the crack all the way to the outside soil and seals it against water. The polyurethane remains flexible after curing to prohibit re-opening of the crack due to minor foundation movement.
Regardless of the construction of the foundation, two common sources of seepage are cracks in the concrete basement floor or the joint between the floor and the foundation walls, called the cove joint. Seepage from either of these sources is caused by hydrostatic pressure under the foundation that forces water in through even the smallest opening.
Hydrostatic pressure is relieved and seepage stopped by installing interior drain tile, a subsoil drainage system connected to a sump pump.
Installing interior drain tile starts with removing a section of the basement floor about a foot wide around the entire perimeter or along only the affected wall. A trench is then dug in the soil below to create an opening next to the foundation footings. The bottom of the trench is filled with washed gravel.
Flexible, perforated pipe, wrapped in a “sock” of filtration fabric is laid on top of the gravel and connected at one or both ends to the sump basin. The trench is then filled with more washed stone and the concrete floor is replaced.
The interior drain tile will alleviate the hydrostatic pressure by collecting groundwater and stop seepage by carrying it to the sump pump for disposal. When properly installed, interior drain will remain maintenance-free.
When interior basement waterproofing is required, the homeowner will need the advice and services of a professional basement waterproofing contractor to ensure that the job is done right with a minimum of inconvenience and at a reasonable cost. At U.S. Waterproofing we’ve been keeping basements dry from the interior (and the exterior as well) since 1957 and have more than 300,000 satisfied customers to our credit. Why not ask for our free advice?